The Hatchling

The Hatchling can be thought of as a ‘choose-your-own adventure’ in which participants can choose to do part of the race route each day - typically either the first half or the second half.
The aim is to give more aspirant Dragons the opportunity to experience the Dragon’s Back Race® adventure down the mountainous spine of Wales, and enjoy the camaraderie of the overnight camps, the spectacular course, and the grand finale in Cardiff.
Completing even half of the full race route is an incredible achievement in itself and we want to officially welcome and recognise those participants who do so; a Dragon’s Back Race® ‘lite’ if you will.
Hatchling FAQs
-
Yes! It works equally well for those using it as a stepping stone to a full Dragon’s Back Race® completion in a future year, or those who are uncertain about their ability to complete the full race but keen to experience it in more manageable chunks.
-
Yes! When you enter the event you will be asked to share your intention to complete either the Hatchling or the full race route.
This is flexible and you can change your mind at a later date, this information will simply help us with our planning.
-
No, it’s best to think of it as a build-your-own journey south in which the building blocks are either the first or second halves of each day.
e.g. you might choose to complete the first half of the first three days, but the second half of the next three, or any combination you like!
-
Sorry, no. You must complete some of the race route each day to be eligible to stay with the event.
-
Yes… If you arrived at the overnight camp on the previous day before the course closure time.
-
Yes, at any point during the race, any participant is entitled to move onto the Hatchling (e.g. if you embarked on the full race route but then miss a cut-off on day three, it’s not all over - you can continue to do part or full days and still be rewarded at the finish!)
-
Yes…but, if you start in the morning, with the goal of completing the first half of the day, you’ll still be subject to the same cut-off times as everyone on the full course. However, these cut-offs are already calibrated so that by starting promptly and moving at a strong walking pace, you’ll get the first half complete within the time.
Likewise, if you aim to complete the second half of the day, you’ll also be subject to the same cut-offs. However, you’ll be transported to the starting location, and get going ahead of most of the field, leaving you sufficient time to complete the second half of the course before the course closure time, if you keep moving at a strong walking pace.
We do reserve the right to retire anyone, at any time and at any point if they fall behind the cut-off schedule.
-
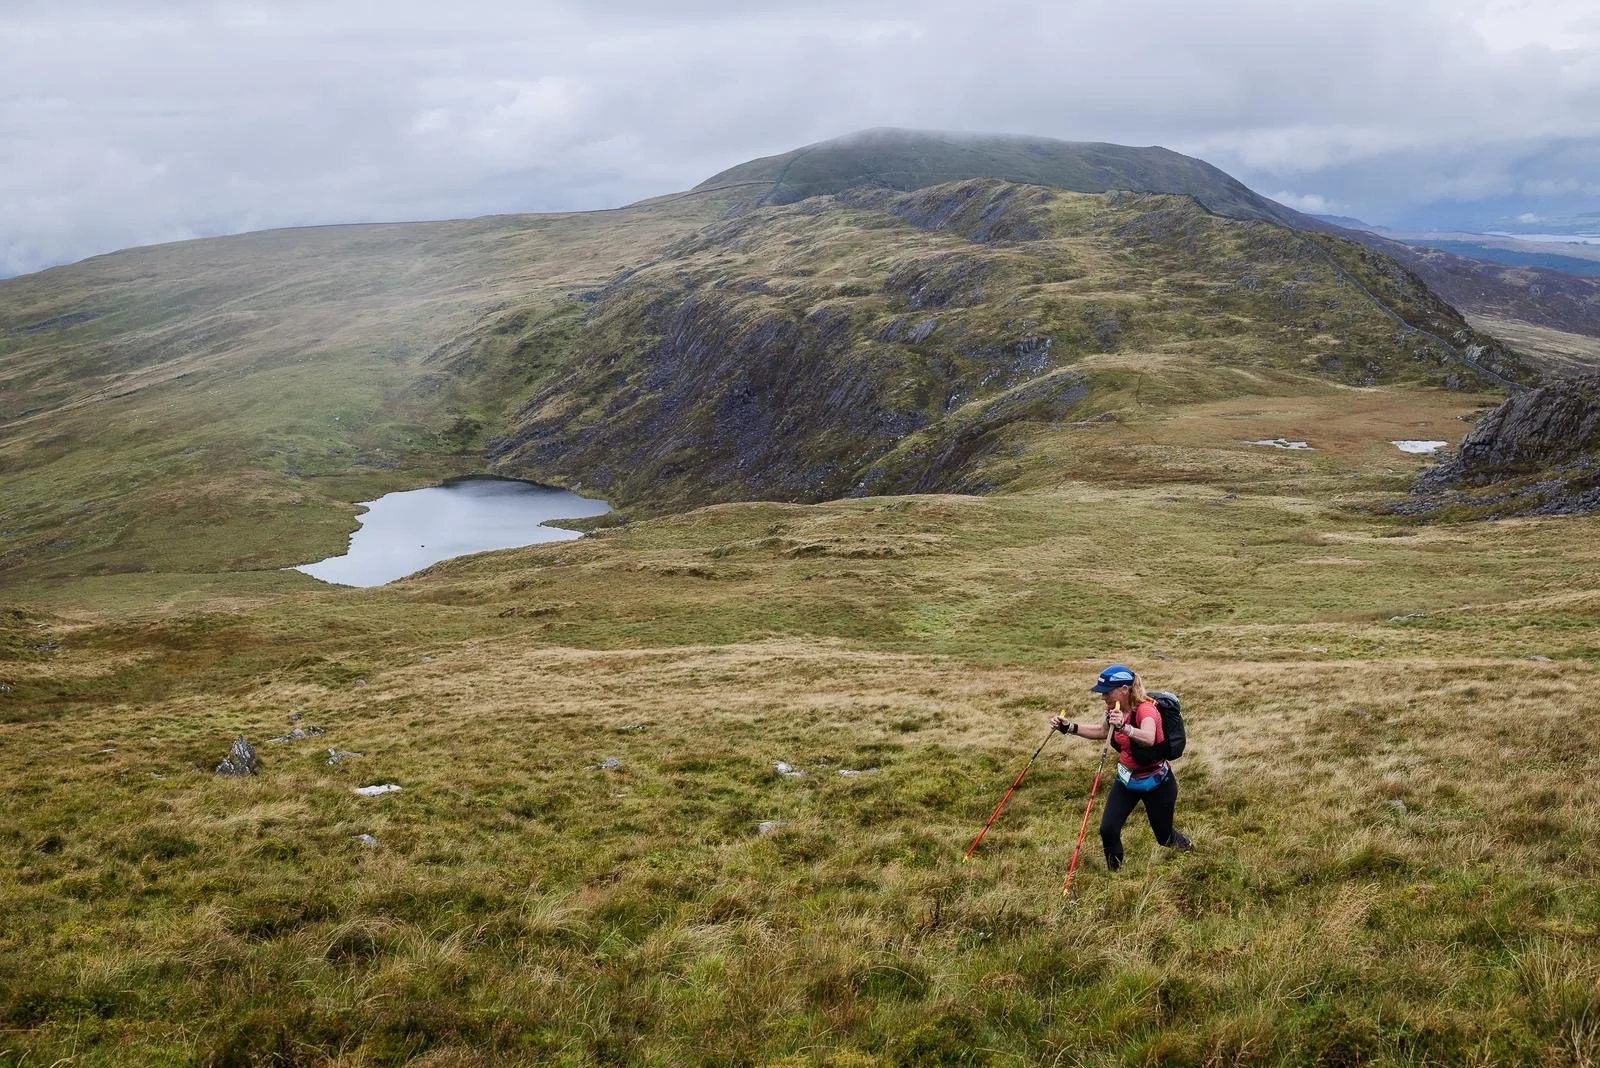
Definitely not! All but the leading runners on the full course are walking all the uphill sections. If you are able to walk strongly throughout the day that will be sufficient for completing the Hatchling.
Whilst a little jog on the downhill and runnable sections will help take the pressure off if you are close to the cut-offs, many participants have completed the first or second half of the days just by fast-hiking.
-
No. If you’re doing the first half of the day we’ll ensure we are ready to collect you when you finish at the support point.
If you’re doing the second half of the day, we’ll drop you off at the support point for you to run to that day’s finish.
Consider your week in Wales as an all-inclusive running holiday if you like!
-
Hatchling participants either set off within the start time window from that day’s start or, for those participants who wish to do the second half of the day, we will calculate approximately when the leading runner will reach the support point location and start Hatchling participants at this time.
This means participants start well ahead of the guidance time schedule and experience shows that this gives plenty of time to complete the day far ahead of the course closure times.
-
Yes! And you will only see this at the Support Point which will be either the start or finish of your day.
-
Yes, we will have a special Hatchling category in the results. This will not be ranked by overall time, because participants will have completed different sections of the course.
The Hatchling is about experiencing the amazing Dragon’s Back Race® course and being part of the incredible camaraderie that makes participation in the event so memorable and special.
-
Yes! If you complete part of the course each day, you will qualify for a special Hatchling memento.
-
Yes. We think it’s great value for money as you are provided with extra transportation!
-
Yes, we will do our utmost to facilitate participants who have previously done for instance the first half of day two, to do the second half of day two in a subsequent year (subject to logistics).
This means that a participant could complete the full Dragon’s Back Race® course, but over two editions of the event.
Day one
-
Option 1 - Start to support point (Ogwen Valley)
- route Distance - 29km
- altitude Height gain - 1800m
- map For mapping, cut-off times & more route details, please see the route page.

-
Option 2 - Start to water point (Pen-y-Pass)
- route Distance - 37km
- altitude Height gain - 2800m
- map For mapping, cut-off times & more route details, please see the route page.

Day two
-
Option 1 - Start to water point (Maentwrog)
- route Distance - 19km
- altitude Height gain - 1200m
- map For mapping, cut-off times & more route details, please see the route page.

-
Option 2 - Support point (Cwm Bychan) to the finish
- route Distance - 23km
- altitude Height gain - 1400m
- map For mapping, cut-off times & more route details, please see the route page.

Day three
-
Start to support point (Machynlleth)
- route Distance - 40km
- altitude Height gain - 1800m
- map For mapping, cut-off times & more route details, please see the route page.

-
Option 2 - Support point (Machynlleth) to the finish
- route Distance - 25km
- altitude Height gain - 1000m
- map For mapping, cut-off times & more route details, please see the route page.

Day four
-
Option 1 - Start to support point (Elan Village)
- route Distance - 33km
- altitude Height gain - 1250m
- map For mapping, cut-off times & more route details, please see the route page.

-
Option 2 - Support point (Elan Village) to the finish
- route Distance - 36km
- altitude Height gain - 1050m
- map For mapping, cut-off times & more route details, please see the route page.

Day five
-
Option 1 - Start to support point (Cray Reservoir)
- route Distance - 39km
- altitude Height gain - 1400m
- map For mapping, cut-off times & more route details, please see the route page.

-
Option 2 - Support point (Cray Reservoir) to the finish
- route Distance - 32km
- altitude Height gain - 1800m
- map For mapping, cut-off times & more route details, please see the route page.

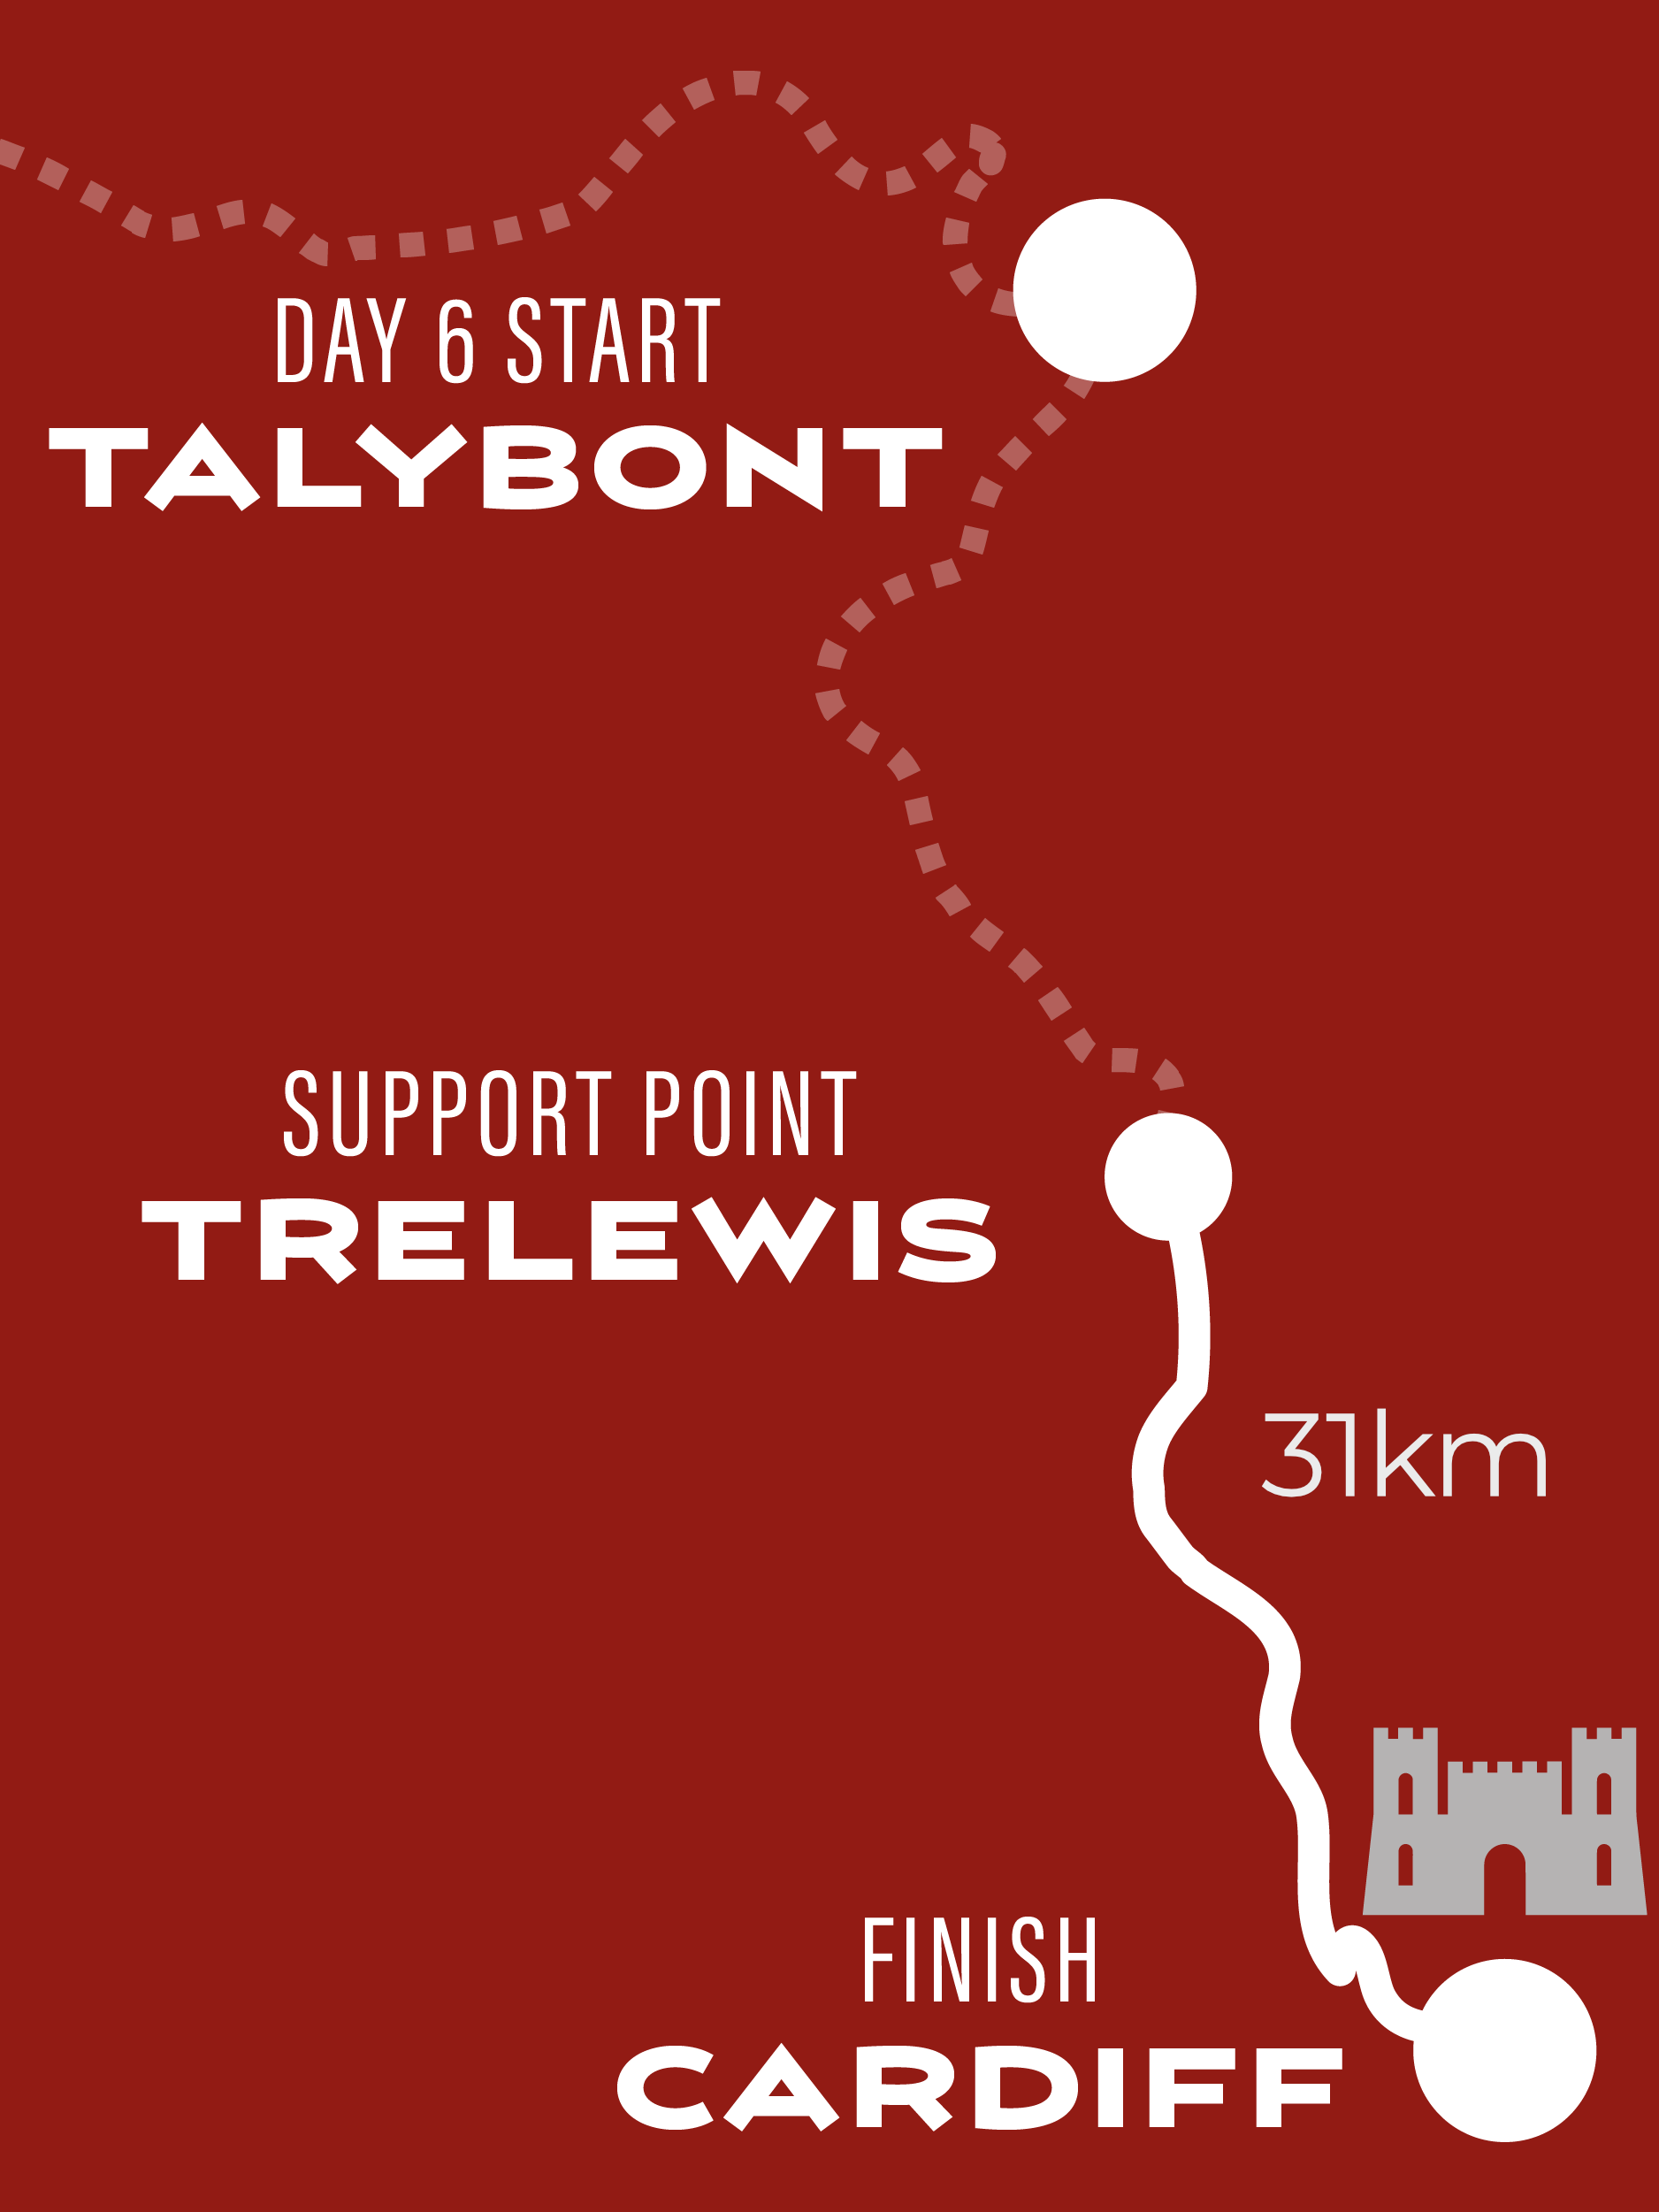
Day six
-
Option 1 - Start to support point (Trelewis)
- route Distance - 34km
- altitude Height gain - 800m
- map For mapping, cut-off times & more route details, please see the route page.

-
Option 2 - Support point (Trelewis) to the finish
- route Distance - 31km
- altitude Height gain - 500m
- map For mapping, cut-off times & more route details, please see the route page.